You + Me

Greetings!

Today I’m sharing a anniversary card I made for my husband.

untitled-6423-1-3

untitled-6425-1

SUPPLIES (All stamp & die products are from Penny-Black) Stamps: Critter Love (30-331); You + Me (30-285) Dies: Flower Portrait (51-114) Color: Versafine Clair (Tsukineko); Tombow Watercolor Markers; Tumbled Glass Distress Ink (Ranger) Other: Brown Cardstock, Wink of Stella Glitter Pen

This was such a busy month that I really didn’t have time to “think” about the card.  So, I made something simple.  I love owls and colored and fussy cut this cute couple owl from Critter Love (30-331) with watercolor markers.  I die cut and adhered the frame from  Flower Portrait (51-114) several times to create dimension.  I shaded the area on the card base with Tumbled Glass Distress Ink where I wanted to place my frame.  I then adhered the frame and stamped image.  The sentiment from You + Me (30-285) was stamped with black ink.

Voila!

Hope you enjoy the week.

Sweet Wish

Hi there!

I’m squeezing one more card before May comes around.  That was fast!

I love making little scenes.  So I couldn’t help create a water scene with this scuba diving Mimi…

SUPPLIES Stamps: Adventures (30-370); Happy Snippets (30-358) Dies: Antique Frame (51-397) Stencil: Dotlets (25-007) Color:  Distress Oxide Ink (Ranger); Clean Color Brush Markers (Zig-Kuretake); Versafine Claire Nocturne (Tsukineko) Other:  Clear Embossing Powder (Ranger) Versamark (Tsukineko), White Embossing Powder (Ranger); Perfect Pearls Spray (Ranger), Bristol Paper


How cute is this Mimi swimming with her fish friends?  Here is how I made my card:

  • On Bristol paper, stamp scuba Mimi image from clear set Adventures (30-370) with black Versafine ink.  Add clear embossing powder.  Head to set.
  • Color Mimi and the 3 fish with watercolor markers.  Fussy cut the images and set aside.
  • On a Bristol paper panel, slowly add and blend hues of blue Distress Oxide Ink with a ink blending tool.  For this card I used Blueprint Sketch, Mermaid Lagoon, Salty Ocean, and Peacock Feathers.
  • Using a brush applicator, add small circles of darker blue using the Dotlets stencil (25-007) over the panel.
  • Splatter water using a wet med. size paint brush.  Once that was dry, lightly spray the entire panel with clear Perfect Pearls.
  • Die cut the panel using the 2nd. die from the set, Antique Frame (51-397).
  • On a black cardstock strip, stamp the sentiment from Happy Snippets (30-358) with Versamark Ink and white embossing powder.
  • Assemble the card.  Add Mimi to the panel using dimensional foam tape.  Randomly add the fish directly adhering them to the panel.  Do the same with the sentiment strip adding towards the bottom right.
  • Adhere the panel to the card base using foam tape.

Until next month!


To a Special Friend

Hi!

Today, I’m sharing my last card showcasing products from Penny Black’s latest release, Sweet Spring.

SUPPLIES: Stamps: good times! (30-463); Grateful Heart (30-467) Dies: Shades (51-055) Color: Clean Color Real Brush Markers (Kuretake); Black Ink, Black Hybrid Ink Other: Woodgrain Cardstock (Ranger); Gentle Whisper Patterned Paper (80-008); Foam Adhesive

I’m quite partial to the dog stamps and had to have good times! (30-463).  For this card, I stamped a image from this set and colored this little guy with watercolor markers.  Once colored and dried, I fussy cut the image and set aside.

To create interest and texture to the card, I decided to use Tim Holtz Distress Woodgrain paper as my panel.  I used the largest die from Shades (51-055) to create a window.  I adhered the stamped image at the window bottom.

I stamped a sentiment from Grateful Heart (30-467) in the center of patterned paper from the set Gentle Whisper (80-008).  The patterned paper was adhered to my card based.  I added foam tape and centered and adhered my panel to the card base to complete the card.

That’s all for now….

Best Wishes…

Hello!

I’m sharing today another card featuring products from the Penny Black’s Sweet Spring Collection.

Thought I’d add another spring card with a few bold colors…

SUPPLIES: Stamps: Lilacs (40-592); Grateful Heart (30-467) Dies: Antique Frame (51-397) Color: Dual Brush Water Based Markers (Tom-Bow); Black Ink Other: Stamp Positioner, Foam Tape, Fun Foam

It’s a clean and simple card with added dimension.  The colors are a little unorthodox but it’s so bright and happy that I went for it.

A stamp positioner such as a Misti would greatly facilitate the coloring of this card.  Position and secure (with magnets) the card panel in the stamp positioner.  Place and align the cling stamp Lilacs (40-592) on the the clear side of the positioner.  Begin adding color directly on the stamp using water based markers.  Lightly spray the stamp with water each time you add color to the stamp.  For this card, I used hues of pinks and purples for the flowers.

Center the largest die from the set Antique Frame (51-397) on the card panel.  Die cut the panel and save both negative and positive cuts.  Stamp the sentiment from Grateful Heart (30-467) onto the bottom left of the positive cut.  Center and adhere the negative cut of the panel onto the card base with foam tape.  Adhere fun foam to the positive cut of the panel and then add foam tape (for further dimension).  Adhere to the the center of the card base to finish the card.

Until next time!


Birthday Wish

Hi there!

I hope you all are enjoying the weekend.  I’m sharing a Birthday card featuring Penny Black products.

SUPPLIES: Stamps: Words of Kindness (30-353) Dies: Shall We Dance (51-242); Flower Portrait (51-114) Stencils: Zigs & Zags (25-010) Color: Abandoned Coral, Picked Raspberry, Wild Honey; Fossilized Amber Distress Oxide Inks (Ranger); Versmark Black Onyx Ink (Tsukineko); Clear Perfect Pearls Spray (Ranger): Other: Acrylic Paper (Strathmore), Clear Dew Drops, Stencil brushes; Clear embossing powder (Ranger)

This card was very simple to create.  I first created my panel.  Using stencil brushes, I lightly added Distress Oxide inks from pinks to yellows over the stenecil Zigs & Zags (25-010) on to a Bristol paper panel.  I then lightly sprayed Perfect Pearls over the panel and the set it to dry. Once dry, I trimmed the panel to about 2.75×3.00″

From black card stock, I die cut flowers using the Shall We Dance (51-242) and Flower Portrait (51-114) Dies.  I trimmed the flowers to a shorter length.  I then adhered the die cuts to the bottom of my paper panel.  I added a sentiment from Words of Kindness (30-353) with black ink and clear EP.

The panel was adhered to Acrylic paper (for texture) and then to my card base with foam tape.  To compete the card, I randomly added clear dew drops as a finishing touch.

Take care!

Nothing Can Dim the Light…

Spring has sprung!

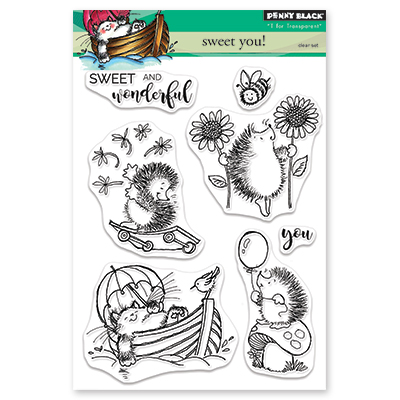
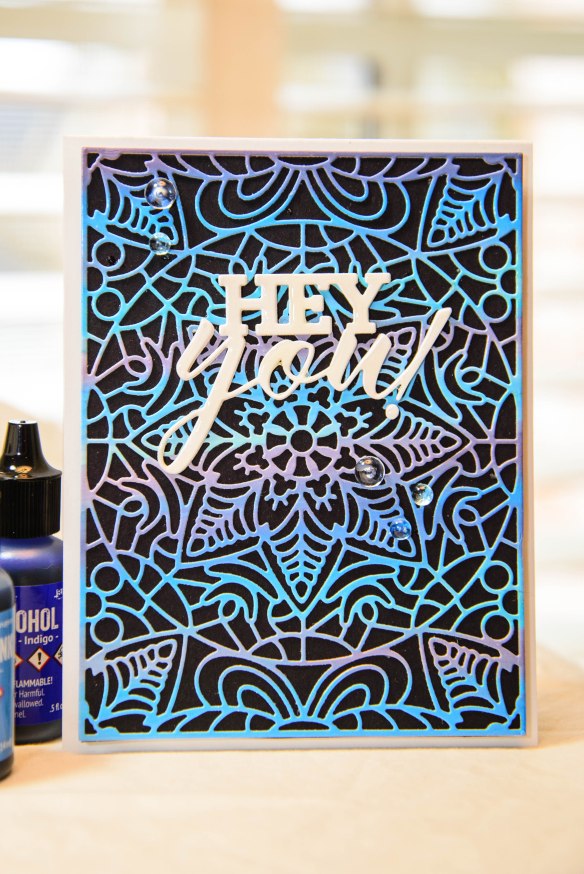
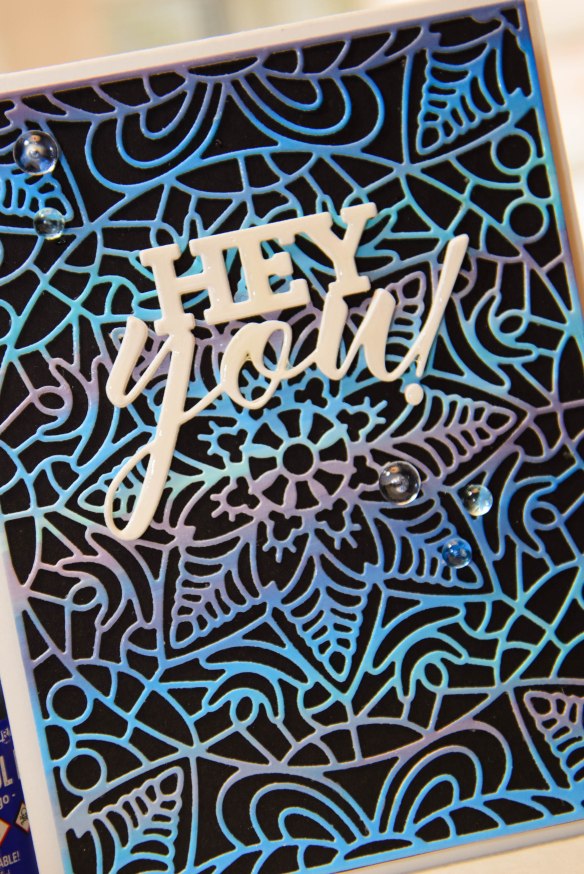
I’m sharing a card using products from the latest Penny Black release.  There were a few products that I absolutely had to have such as the Starry Die (51-412) and the Margaret Sherry clear set Sweet You! (30-471).  They simply put a smile to my face.

SUPPLIES: Stamps: Sweet You! (30-471), Just Believe (30-470) Dies: Stary (51-412) Color: Black Soot, Squeezed Lemonade, Blue Print Sketch, Faded Jeans, Chipped Sapphire, Seedless Preserves Distress Inks (Ranger), Copic Markers, Black Hybrid Ink; Antique Brass Distress Strain Spray (Ranger) Other: Versamark (Tsukineko), White Embossing Powder, Gold Foil Paper, Glitter Gold Paper


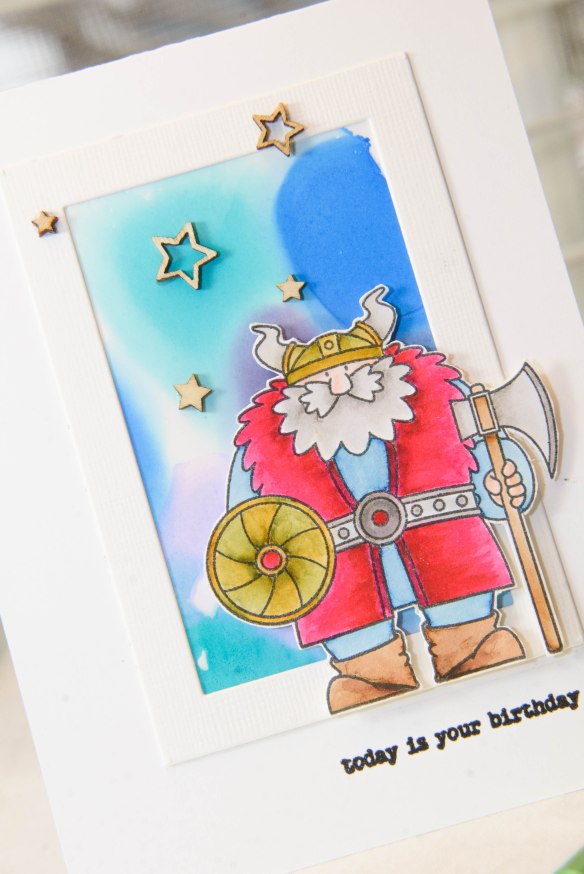
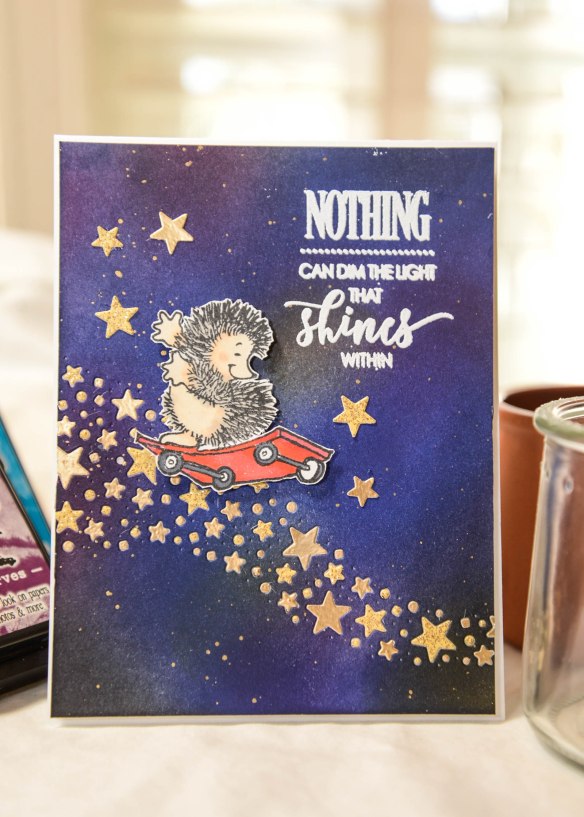
For this card, I started out creating the midnight sky.  I combined various dark blue, purple and yellow Distress Inks to create my background.  I then added Antique Brass Distress Spray Stain by removing the top of the bottle and gently tapping the straw to create a even splatter.  I set that aside to dry.

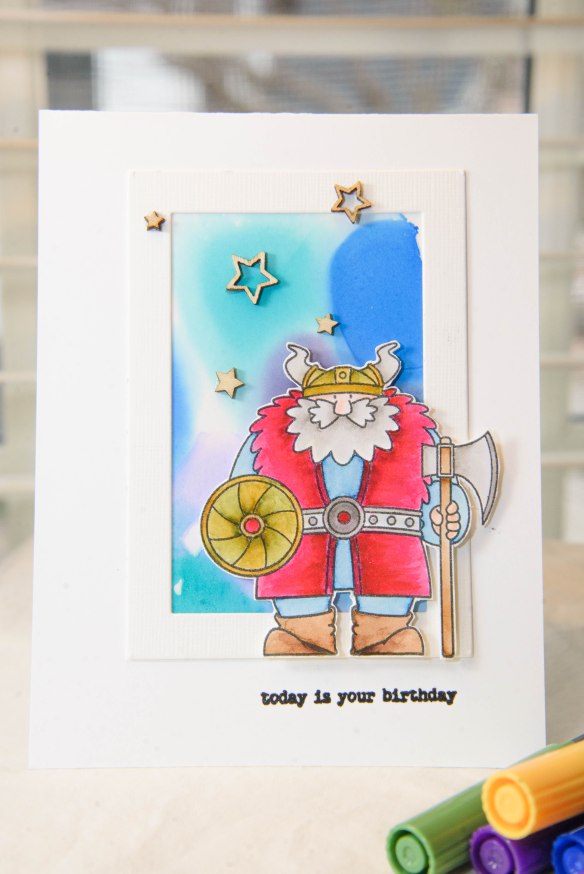
I colored with Copics the little hedgie on the skateboard from Sweet You! (30-471).  Once colored I carefully fussy cut the image.

Once my midnight sky card panel was dry, I die cut Starry (51-412)  slightly on a angle towards the bottom of the panel.  I measured and cut white card stock to match the dimensions of my panel.  I then added wide Scor-Tape along the card stock and adhered it to my panel.  That way, I would have exposed adhesive behind my die cut.

I then die cut the Starry die again on gold foil paper and gold glitter paper.  I popped the stars out and randomly added the stars to my panel.

The final steps were to white heat emboss my sentiment from Just Believe (30-470) on my panel.  The panel was adhered to a white card base using foam adhesive.  I adhered my hedgie image to the panel on top of the die cut.  I then added a few stars as well to the panel.

I’ll be honest, it was a little tedious to add back all the stars into the die.  But I simply love the effect.

Until another time!


Celebrating You

Hi there!

I’m sharing another card using products from the new Penny Black release, Sweet Spring.  I always look forward to the critter stamp sets in each new release – especially the cute images created by Margaret Sherry.  So here’s a card using her very cute cat images.

SUPPLIES Stamps: sweet you! (30-471); good times! (30-463) Dies: Stitched Squares & Circles (51-422) Color: Copic Markers; Prismacolor Pencils; Broken China, Tumbled Glass  & Squeezed Lemonade Distress Inks (Ranger); Black Hybrid Ink

How cute is this cat image sitting in his boat without a care in the world.  This image is from the clear set sweet you! (30-471).  I stamped this guy with black ink and colored him with Copic markers.  I then fussy cut the cat and set him aside.

I wanted to put this cat in an ocean scene.  From blue card stock, I die cut 3 small circles using the die set Stitched Squares and Circles (51-422).  I set this aside and worked on the rest of the components of my card.

I colored a separate piece of card stock using blue distress ink to create a ombre effect.  A circle frame was cut from this using the largest circle from the same die set.   Using the 2nd largest circular die, I cut a circle at thee top center of my card panel.    I adhered the circular ombre frame over the cut circle.

I adhered my stamped image with the smaller blue circles.  i arranged them in such a way where the circles looked like waves.   I fussy cut the cat’s arm from the boat and was able to tuck the circle waves between the boat and the circle.  Once I was happy with my arrangement, I adhered the image with glue.

On my card based I lightly colored the area with blue Distress ink where the circle would be positioned.  I also stamped my sentiment from good times (30-463) on my card panel.  I assembled the card by positioning and then adhering my stamp image behind the card panel.  I then added foam tape to secure the panel to my card base.

I hope you enjoy your week!


…the World to Me

Hi there!

It’s a gray day here in these parts.  And I’m hoping to add a little warmth and color to part of your day with a floral card.  Today, I’m sharing a card using products from the new Penny Black release, Sweet Spring.

SUPPLIES: Stamps: Exquisite (40-614); Heartful (30-286) Color: Dual Brush Pens (Tombow); Gansai Tambi Watercolor Set (Kuretake); Pumice Stone and Picket Fence Distress Ink (Ranger); Black Onyx Versafine (Tsukineko) Other: Versamark Ink (Tsukineko) Clear Embossing Powder (Ranger); White Embossing Powder (Ranger); Bristol Paper; Vellum Paper; Clear Dew Drops

I really love the floral stamps from this new release and chose the appropriately named flower image, Exquisite (40-614).  I stamped the image on a panel of Bristol paper using Versafine ink and white embossing powder.  I then colored the image with my dual brush bens using hues of  pinks and purples.  I would add a small dab of ink towards the center of each petal and then dragged the color with a waterbrush pen.  I did the same using yellow hues for the center of each flower.

I didn’t want my background to be completely white and decided to add a little blue around the flowers.  I mixed the lightest blue and white from my Gansai Tambi watercolor set to create a lighter blue.  I carefully added water to the panel and then added the color.  I allowed it dry and found that it was a little too light for me.  So, I then added a mixture of Pumice Stone and Picket Fence Distress Ink and water around the petals.

To complete the card, I added a sentiment from Heartfelt (30-286) to a vellum strip.  The sentiment was stamped with Versafine Ink and then clear embossed.  I attached the vellum strip to my panel and then attached the panel to my card base.  I added clear dew drop embelleshmints to complete the card.

I’ll be sharing a few more cards from this release in the next few weeks.   So stay tuned!


Hey You!

Hello!

SUPPLIES: Dies: Stellar (51-078); You Enjoy (51-339) Color: Alcohol Inks (Ranger) Other: Glossy Accents (Ranger); Alcohol Blending Solution (Ranger); Clear Gems; Black Cardstock

I thought I’d play again with my alcohol inks.  This time I just added various hues of purples and blue alcohol inks to my applicator as well as a generous amount of blending solution.  I swiped the applicator on glossy paper going left and right until the glossy paper panel was colored.

Once the paper was dried, I made a die cut from the intricate die, Stellar (51-078).  Once carefully cut – I ran it through my Big Shot several times – I adhered it (by adding small dots of glue to the body and frame) over black card stock.

I then die cut a sentiment from the die set You Enjoy (51-339) several times from white card stock.  I adhered the sentiment together and then placed towards the center of my panel.  I used foam tape to secure my panel to my card base.  I then added glossy accents to the sentiment and a few gems to finish off the card.

Until next time!

p.s.  I am on the Simplicity Sister blog this week.  Here’s a quick peek!  Or you can check out the card here.


Have a Norse Day

Hi there!

My daughter loves Norse (and Greek) mythology.  And what better way to celebrate her birthday by creating a card using Birdie Brown’s Viking.  What perfect timing!


SUPPLIES Stamps: BB Viking (MFT); Birthday Stamp Set (Ali Edwards) Dies: Rectangle Frames (MFT) Color: Alcohol Inks (Ranger); Dual Brush Pens (Tombow): Black Licorice Hybrid (MFT); Black Onyx Versafine (Tsukineko) Other: Wooden Star Embelisshments (Studio Calico); Arcrylic Paper (Strathmore); Clear EP (Ranger); Glossy Paper (Ranger)

I first create the background using some old glossy paper by Ranger.  Thought I’d get on the alcohol background coloring bandwagon and pulled out my colored bottles that have been left untouched for a number of years.  I just added the colored alcohol (blues) on the paper and dropped blending solution directly on the paper.  I trimmed the glossy paper and then created a frame using Arcrylic paper.  I love the subtle texture of Arcyrlic paper and thought it would be a nice contrast to the smooth glossy and card base.

I watercolored the Viking image using Tombow Dual Brush Pens.  The image was fussy cut and then adhered to the frame.  I attached the completed panel to my white card base.  The sentiment from a Ali Edwards Birthday stamp set was stamped with Versafine Black Onyx and clear embssed.  Finally, I added wooden star embellishments to complete the look.

My daughter loved it.  She’s into puns and she loved the inside Viking sentiment which was “Have a Norse Day”.